A week ago I watched Tony Northrup’s tutorial on how to create fake background blur video, that made me want to share a way, how I do it.
I am not saying, that this way is better, because it has some problems, but it is quite different and to some of you it will learn something new.
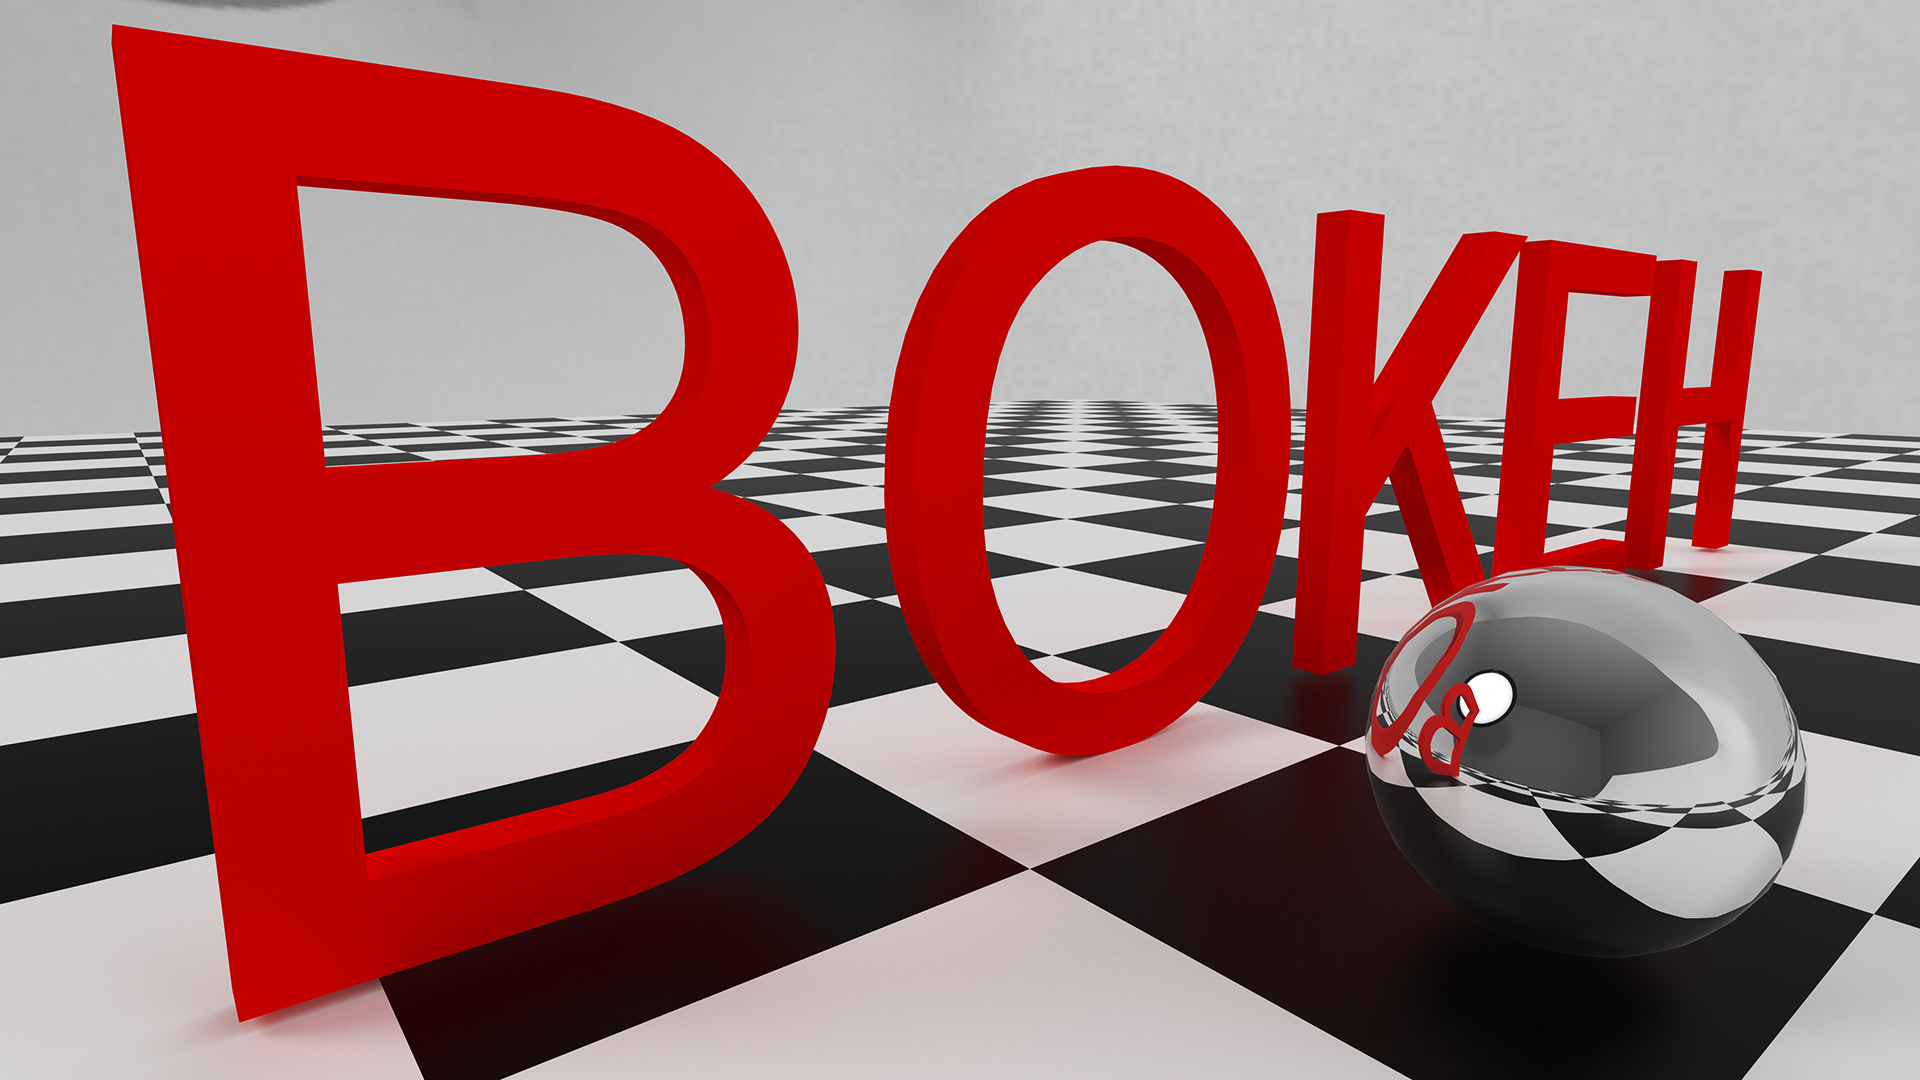
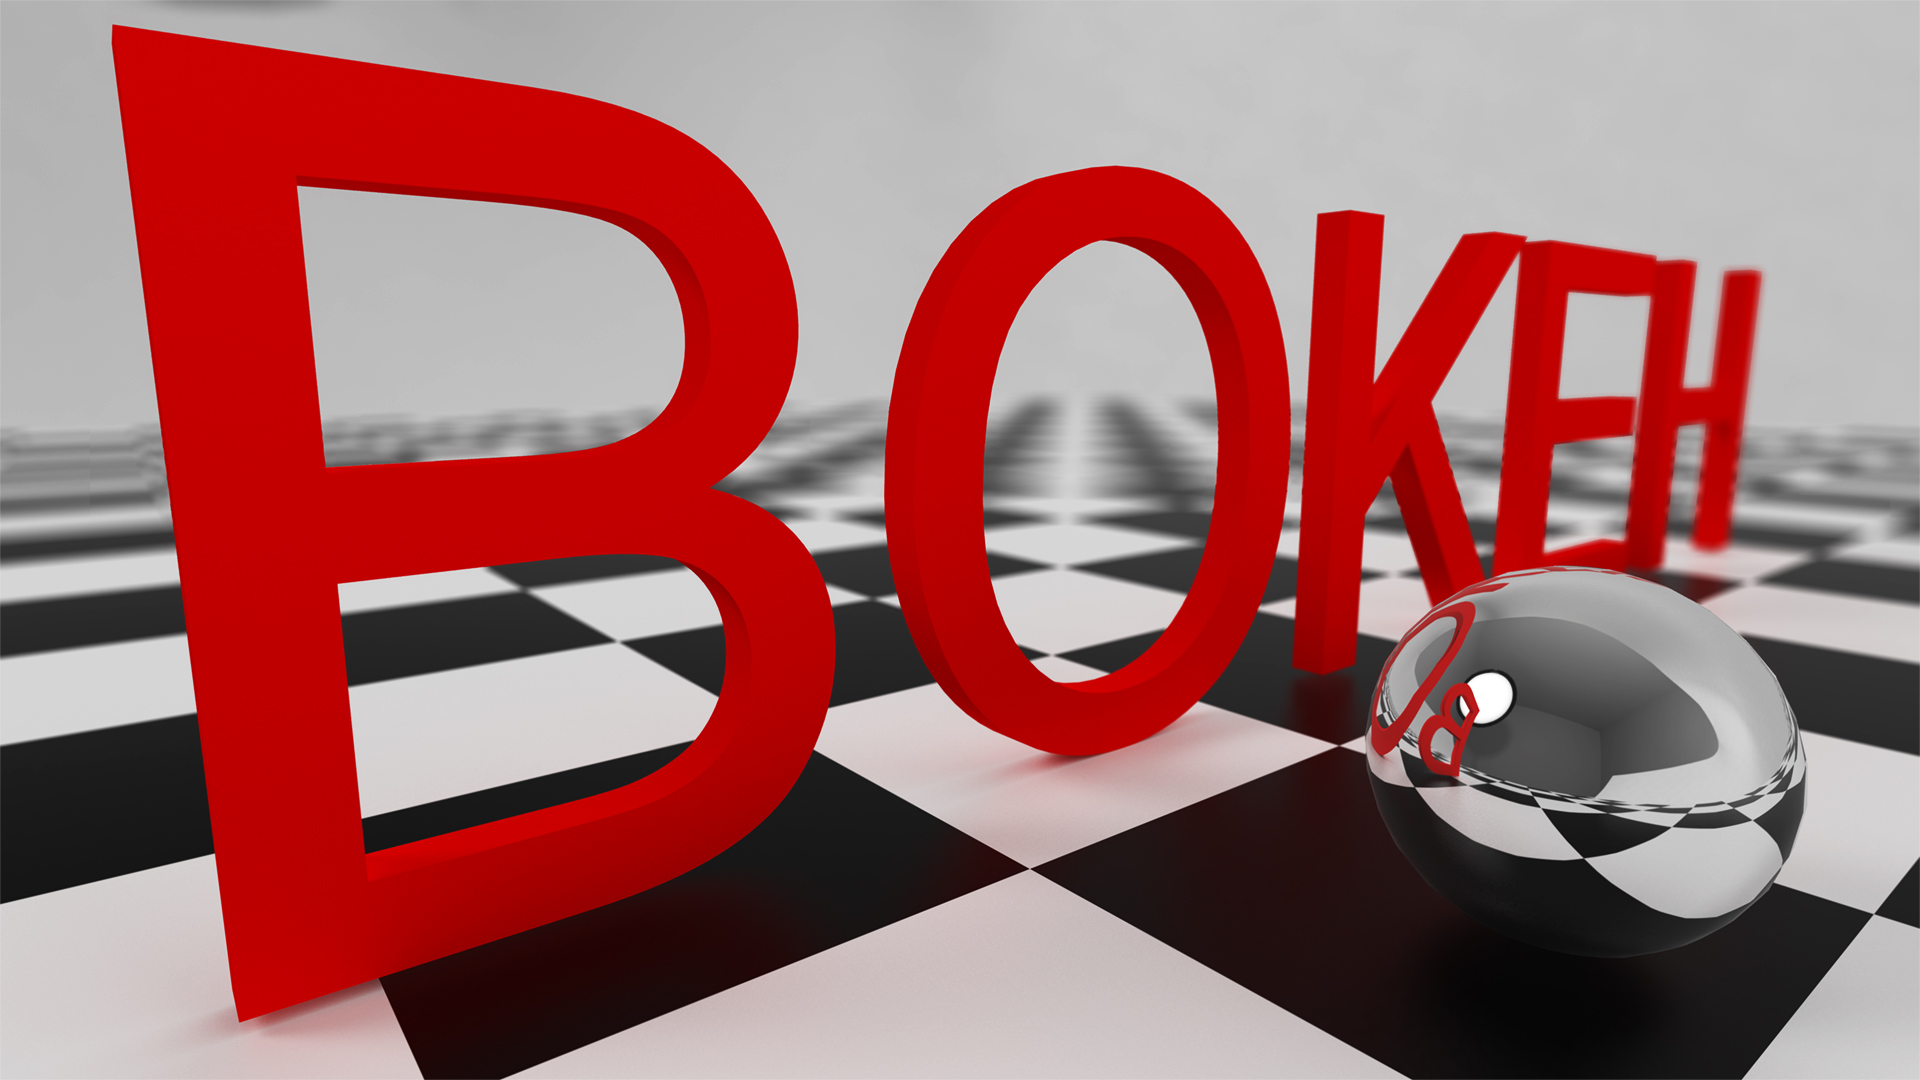
Here, you can see before and after.
Before I start the tutorial, I want to explain, where this technique comes from and how does it work. If you don’t care – you can skip straight to tutorial.
This blurring technique is using something called z-depth pass. It is really old technique, that is used in composting of 3d computer graphics. Basically, it allows to render 3D scene without depth of field blur, then add depth of field as part of post-processing.
Here is a quick video, that shows this workflow:
The scene is usually rendered in multiple passes, like beauty pass, reflection pass, shadow pass, z-depth pass, etc…
In this specific case, I rendered beauty pass(base layer):
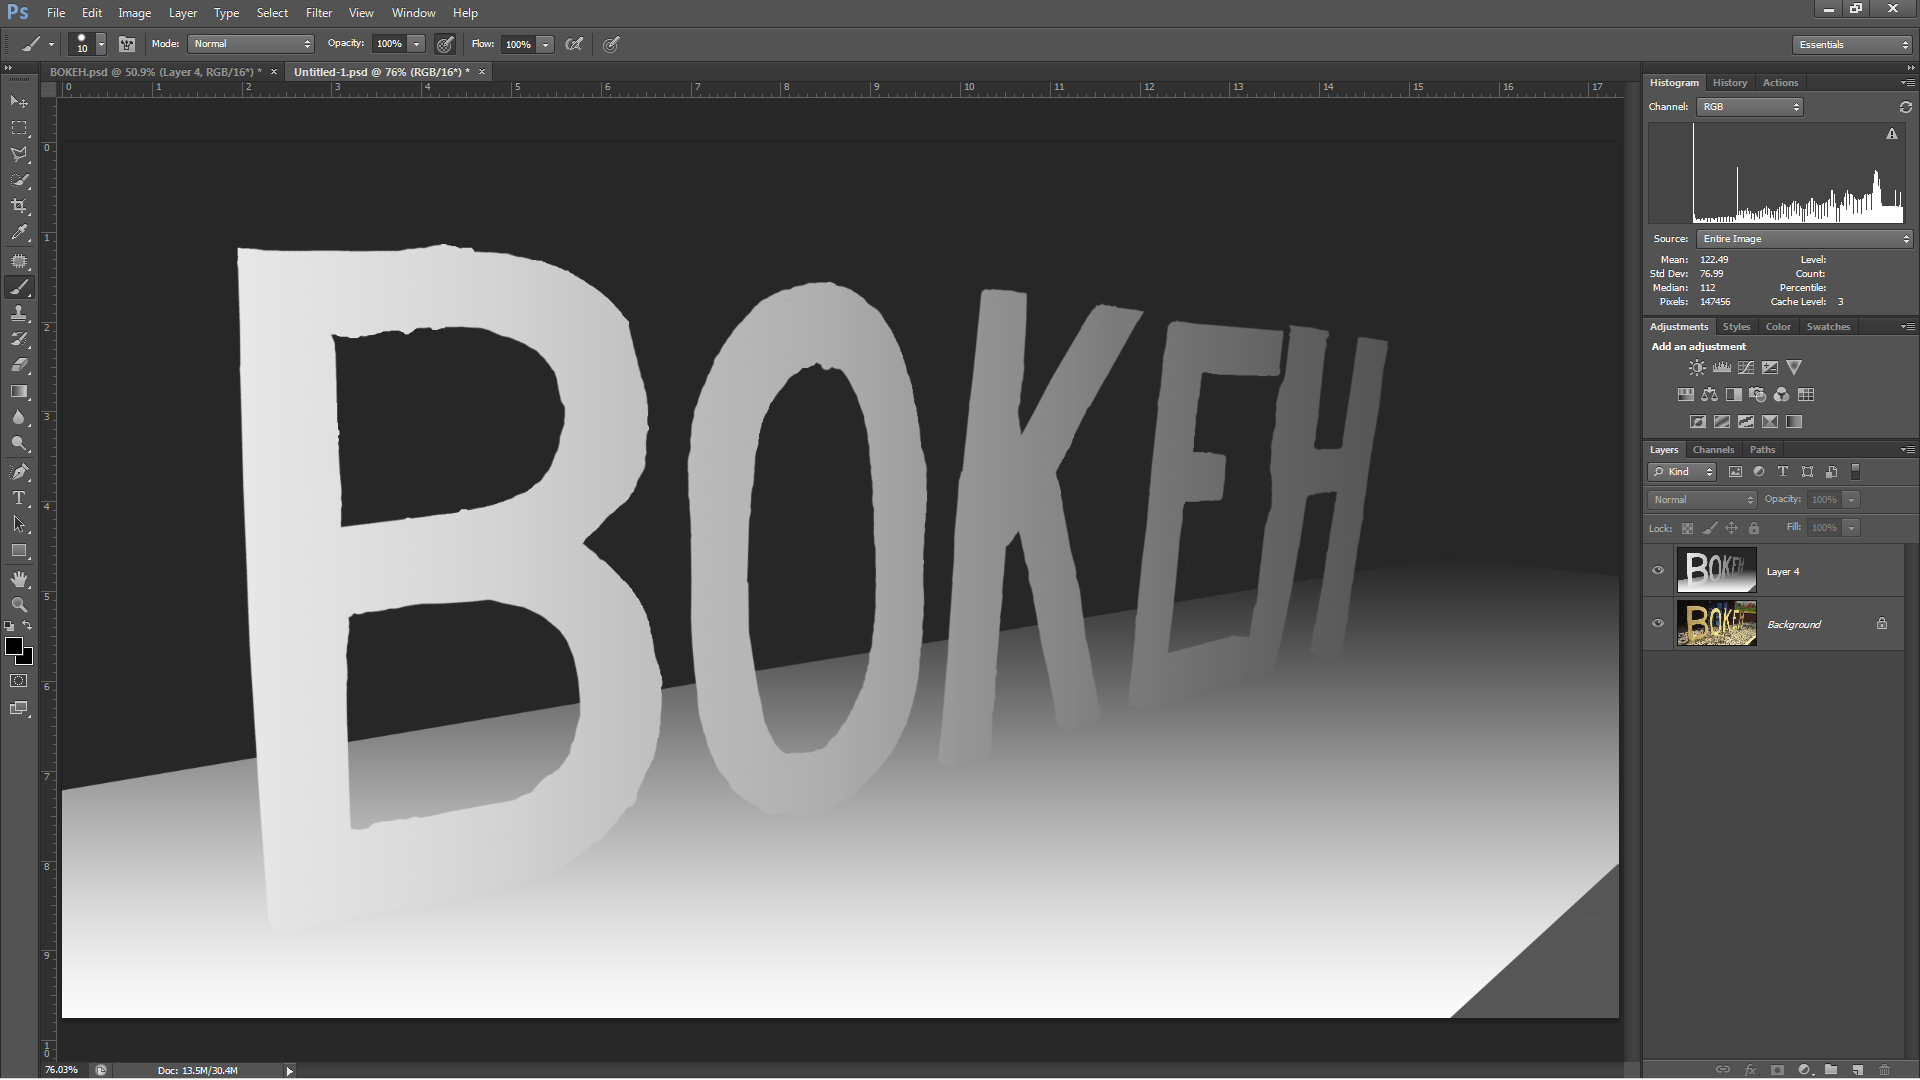
and z-depth pass.
It is simple grayscale image, that maps depth information of individual pixels. Further pixel is from camera – darker it is and vice versa.

Most of compositing softwares have tools, to create fake depth of field from z-depth pass. It is even possible to animate depth of field shift, from still frame, like in light field photography.
Now, knowing how z-depth pass works, you don’t have to be rocket surgeon, to figure out, that theoretically, it is possible to do the same thing with photographs in Photoshop.
So, here’s how to create fake depth of field in Photoshop, by creating z-depth pass.
Here is a quick time-lapse, through the entire process:
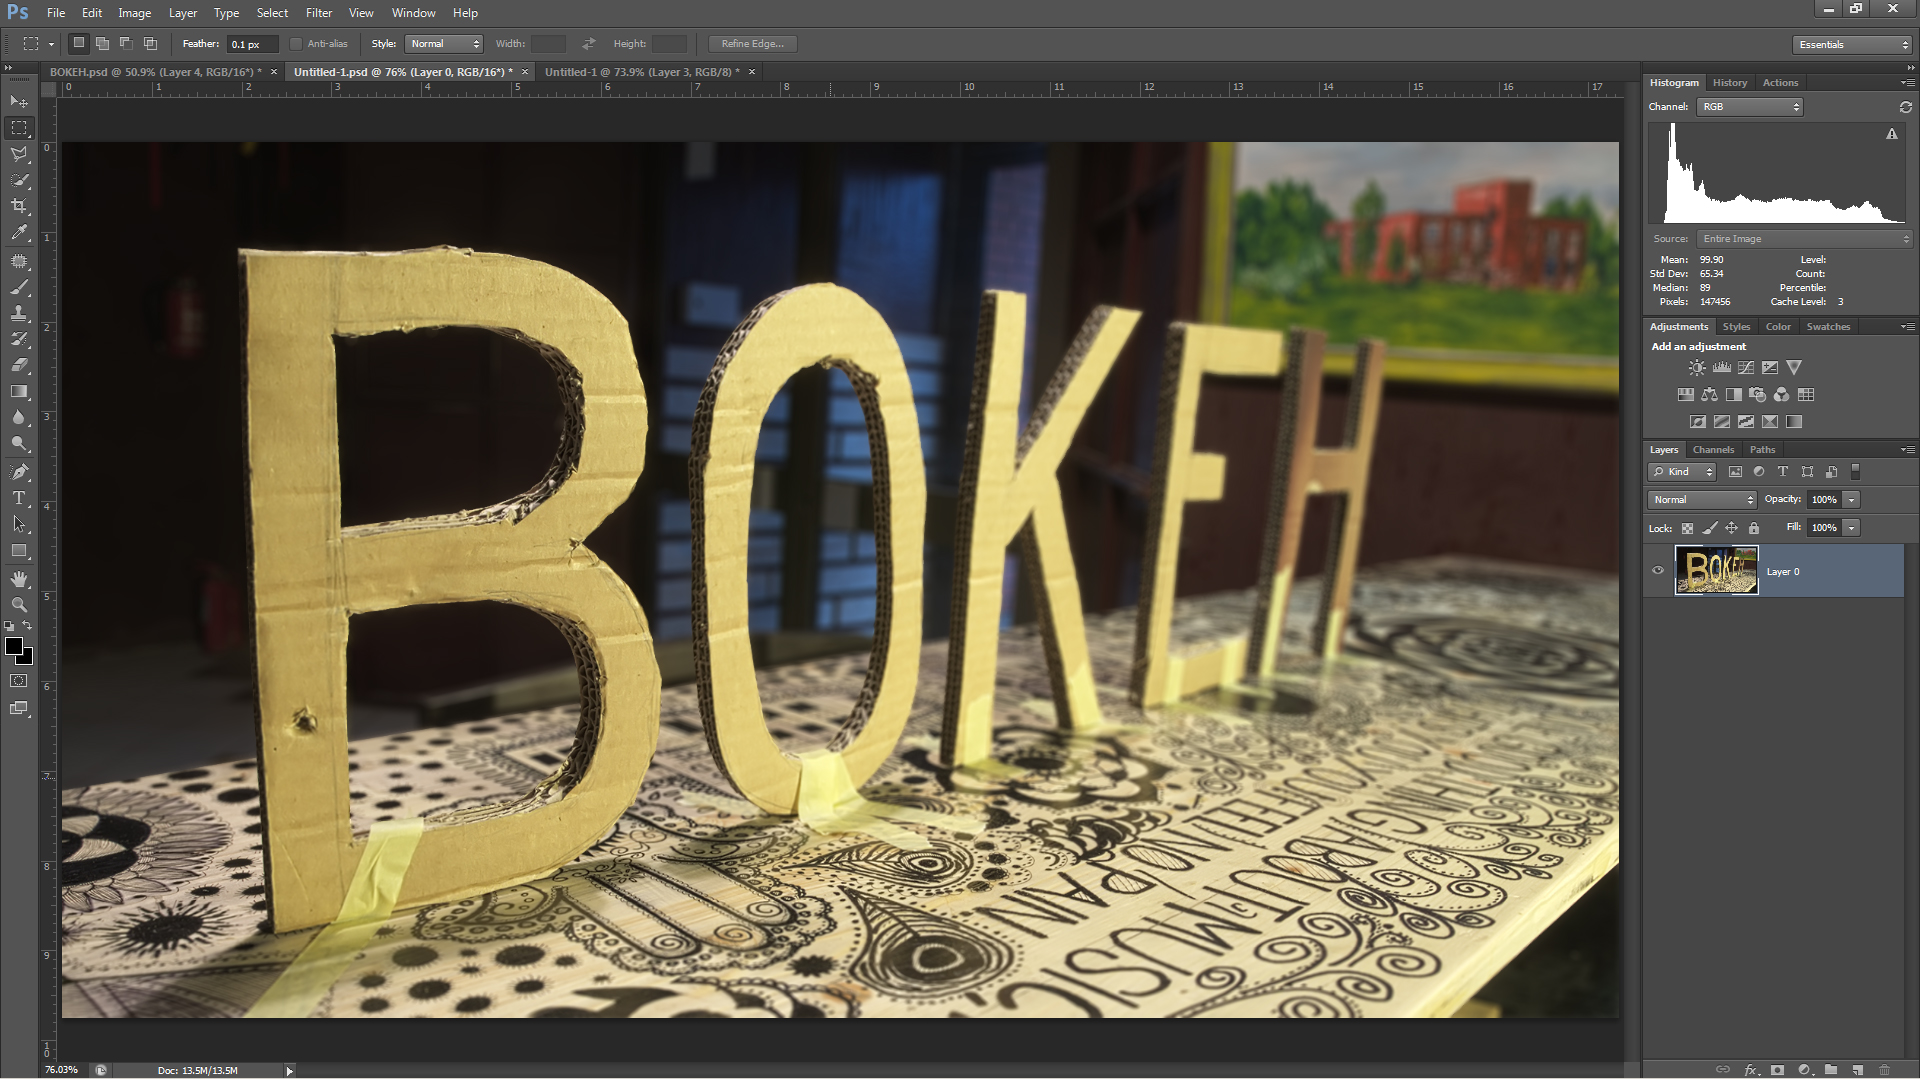
First, you will need base image. It is important, to have as sharp and big image as possible.

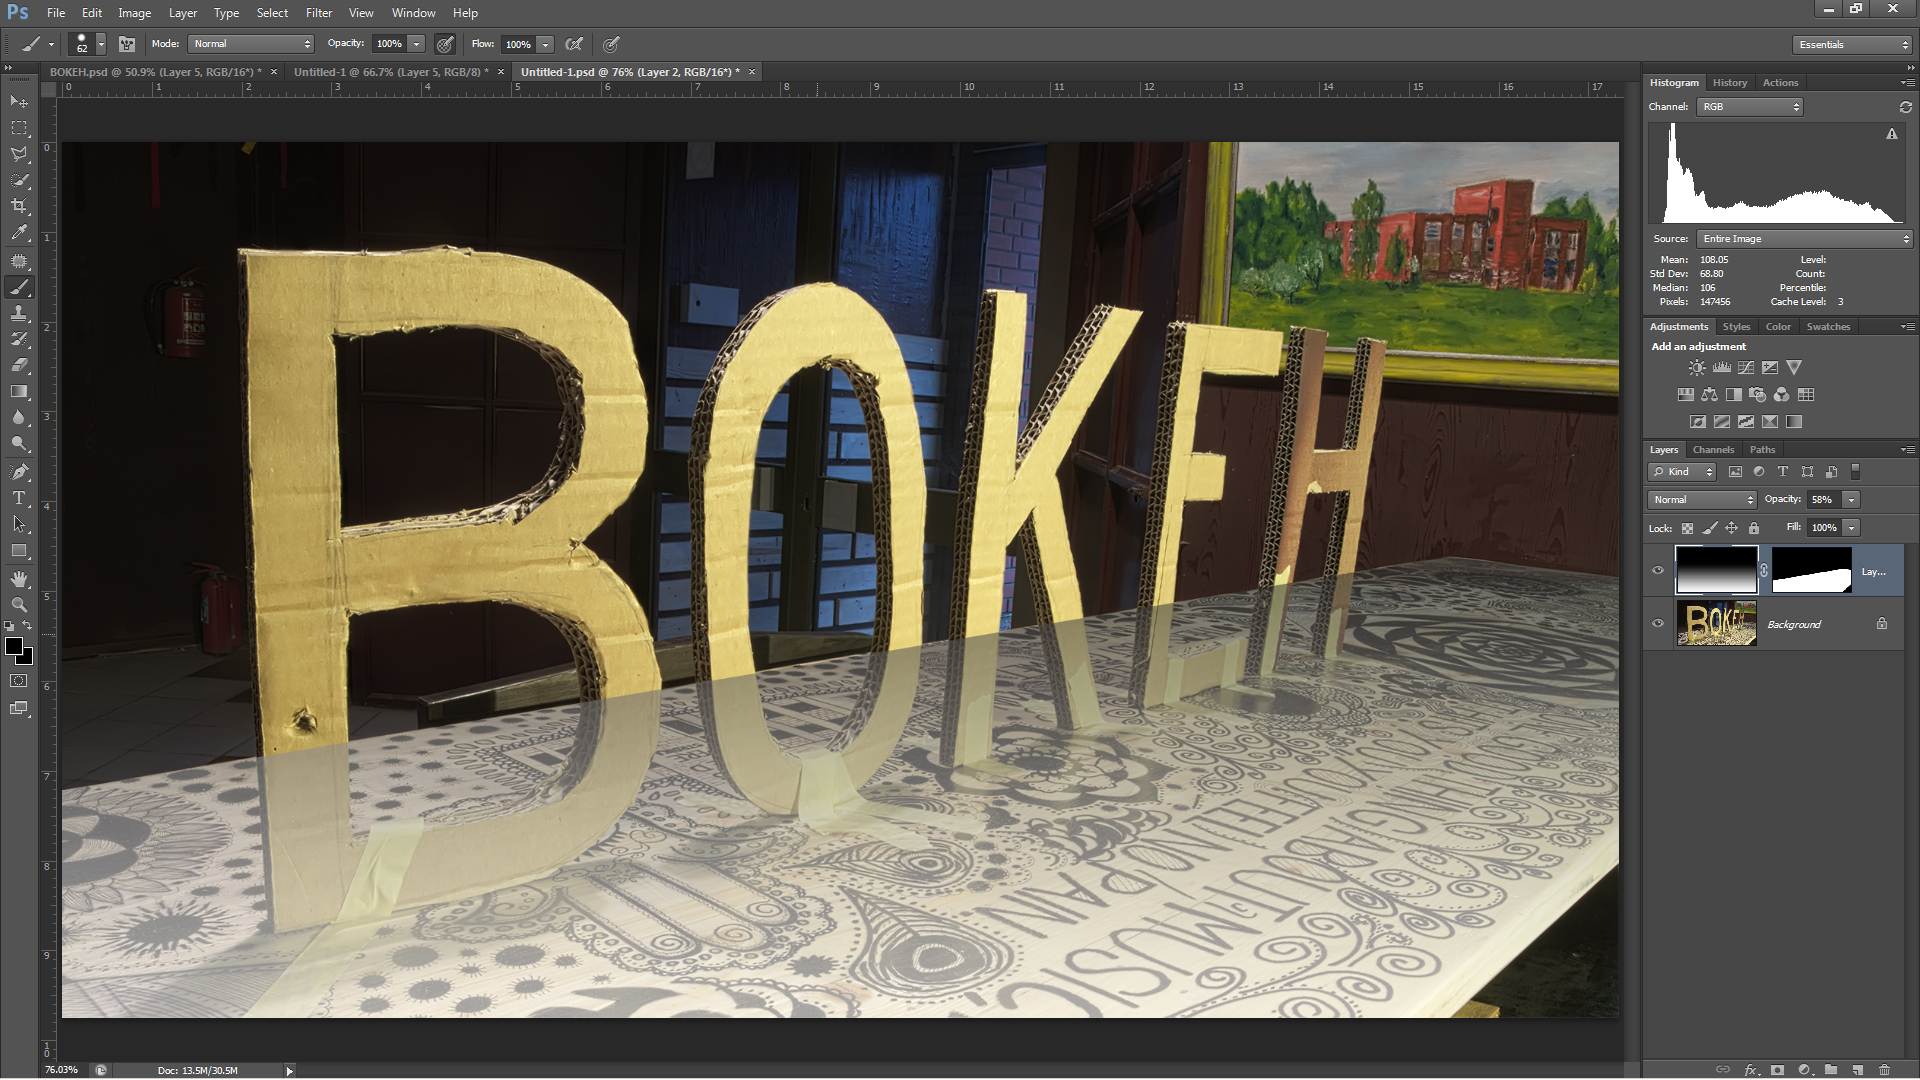
Then, a gradient is added, to represent base of the scene. This can be floor, wall, but in my case bar counter.

Next, I added layer mask, to cut out bar counter from the background. To make it easier, I decreased gradient opacity of this layer.
After the base was done, I created new layer and masked out the letters. In this case I needed only one layer, but in many cases, it is necessary to create separate layer, for each object.
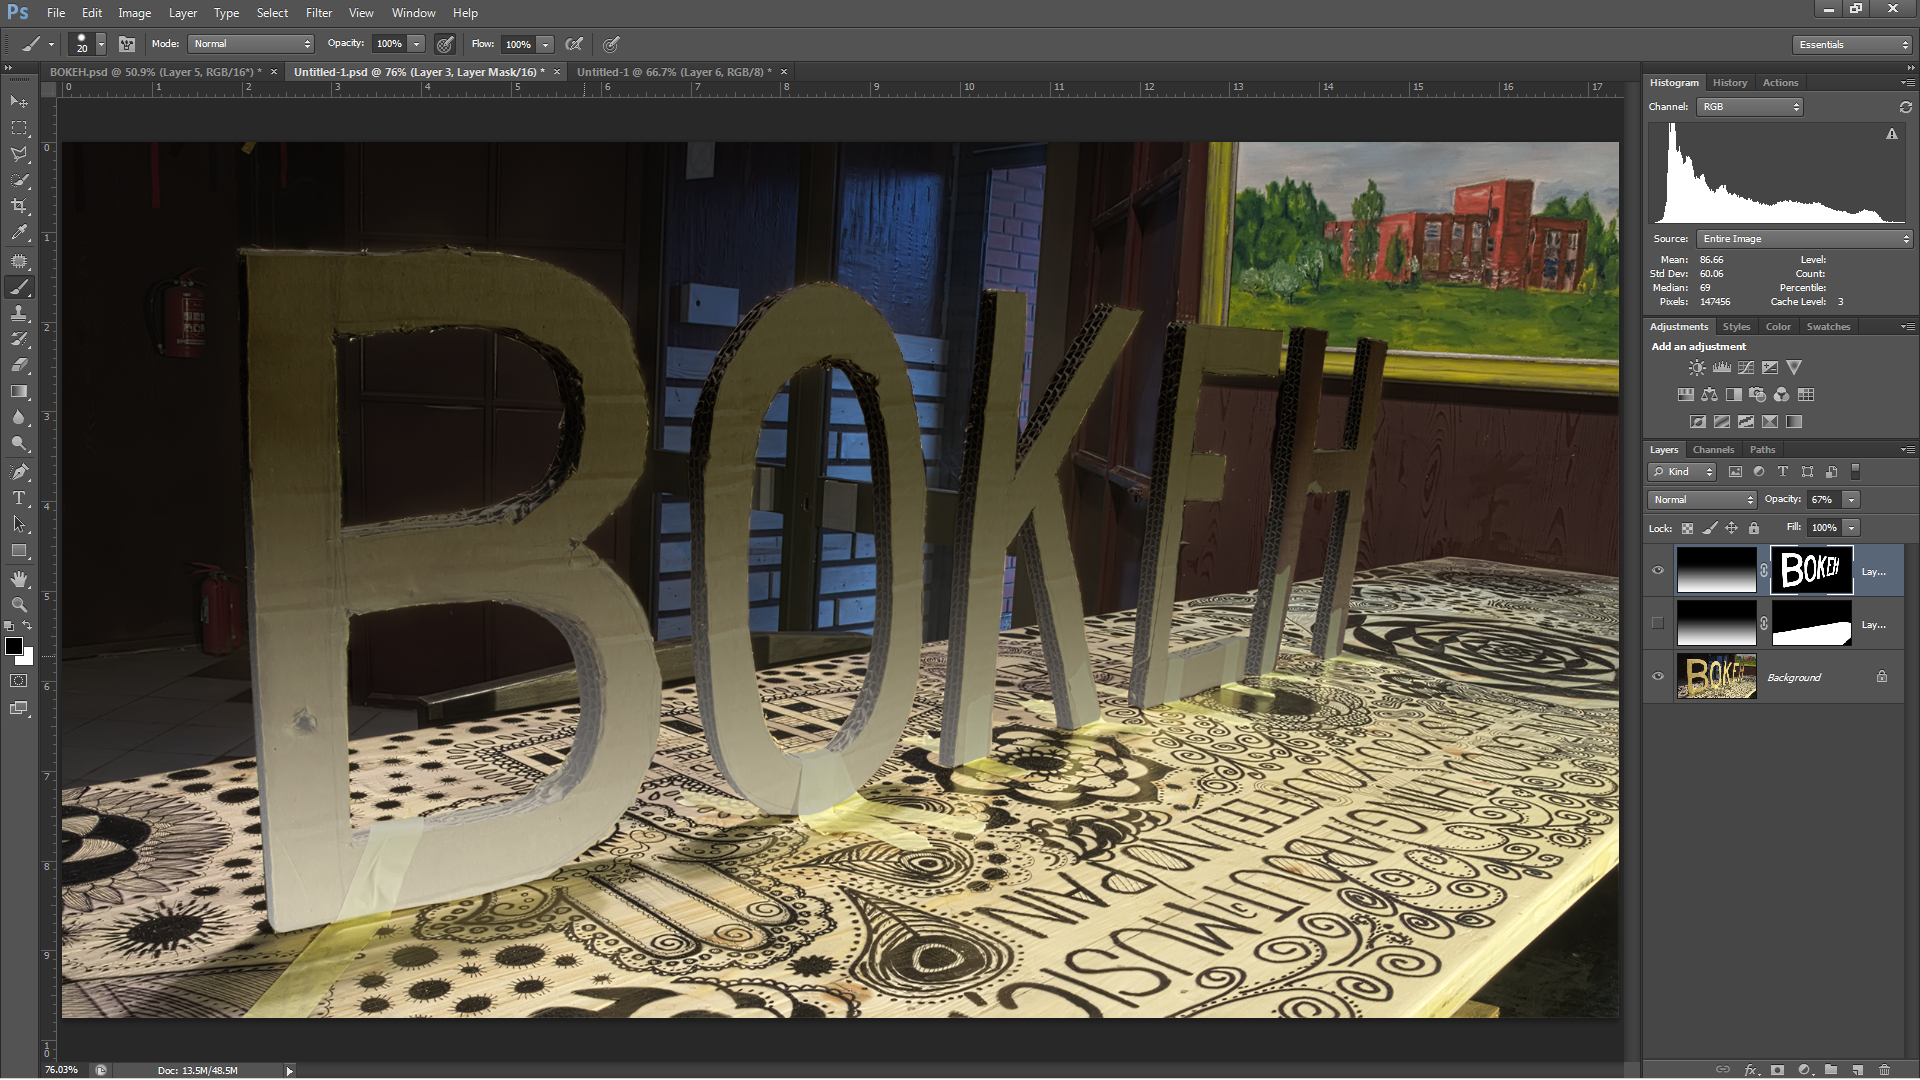
The easiest technique, to paint correct depth information of each object, is to sample color of base gradient at where the object is touching the base. Then, use this color, to paint in the object. In my case, I used clone stamp tool, to sample the base and paint in all the letters.

In the next image, you can see, finished letters.

To finish up, I created background, that I painted it in the same color as the furthest part of bar counter. All I had to do now, to finish this z-depth pass, was to collapse it to single layer.
To make it possible, to blur the image, I need to create layer mask for the photograph and copy z-depth pass to it.

When the most tedious part of this process is done, let’s get to the fun part!
Open: Filter>Blur>Lens Blur…
A new window with the Lens Blur tool will pop up.
To use previously created z-depth layer – change Depth Map Source to Layer Mask.
Now, you can tweak blur amount and look with Iris parameters. To focus, on specific area, you can left-click on desired point on image, or play around with Blur Focal Distance slider.

After you finish up Lens Blur tool, you will need to delete layer mask, with z-depth. And voila!
Now, let’s talk about disadvantages and issues of this technique. Like I mentioned in the beginning, this technique requires really sharp and large images. This is because object masks need to be as sharp as possible and they have to overlap perfectly with photograph. This can be quite tedious process. Although I used Brush tool, for masking – it is better to use Pencil tool, without anti-aliasing, to have even sharper results.
Next, even with perfectly sharp and aligned z-depth pass, you will still encounter some artifacts, around the edges of objects. That can be corrected simply, by blurring these edges with Blur brush, after applying Lens Blur tool.
That is pretty much it!
Hope you enjoyed this tutorial.
Questions and comments below.

Pingback: How to Fake Depth of Field Blur in Photoshop Using Z-Depth Pass | Photohangout·
Pingback: How to Fake Depth of Field Blur in Photoshop Using Z-Depth Pass - 天天瘋後製教學區·